Showing posts with label Crochet. Show all posts

Cat Stand Under the Cup


For work you will need:
- Alaska yarn from the manufacturer Nako gray;
- Yarn;
Acrylic is white and pink;
- hook number 2;
- a pair of peepholes (black half-beads);
- ornaments (bow);
- some felts.
And the ability to crochet ovals, circles and triangles. There are no schemes. In fact, everything is very simple - only 17 pieces. And a little imagination.

We knit the workpiece. We will need:
1 circle - the body (connected to the CER 4 rows in a circle, the thread is gray)
2 ovals - the head (4 rows of RLS, 1 row of SSNs are connected in a circle, the thread is gray)
1 oval - muzzle (4 rows of RLS are connected in a circle, the thread is white)
2 triangles - eyelet (1 row connected - 2CON, 1CC2H, 2CN into one loop, 2 rows of RLS gray thread)
2 triangles - the inner part of the ear (dial 6 in, knit, subtracting on the sides, pink thread)
4 paws - (knit as half of the oval, RLS 2 rows back and forth, thread gray). Front slightly longer than the rear. On the front dialed 8 in, on the back 6 in.).
4 cushions on the feet - (2 circles 10 SSS in ka, 2 semicircle 8 SSS in one loop)
1 tail - get the desired length from the inside of me 15. To twist the tail, tie it in a zigzag. In one place lower 3 loops, in the other make an increase from 3 loops.


Sew pads to the paws and pink triangles to the ears, the tip of the tail embroidered with white thread.

Tie the two ovals of the head, inserting the ears between them. Fill with sinter and distribute the remainder.

To issue a muzzle. Sew a white part, lightly fill it with sinters. Slightly pull the muzzle down the center, embroider your mustache and nose. Glue the eyes.

Head, front legs and body tie in one step. Hind legs and a tail also tied a crochet.
Decorate your cat with a bow, or as fantasy tells.
A perfect gift for friends and family is ready!

Crochet Chick Amigurumi

Crochet Chick Amigurumi

This is a cute project for Easter and it’s free! Crochet the sweet chick in dress with this easy to follow step-by-step amigurumi tutorial.
Designed and photos by Tatyana Kostochenkova

Materials:

  • Yarn: YarnArt Jeans (50% cotton 50% acrylic, 50 g/160 m) yellow (67), blue (75), green (79), white (62), orange and pink
  • Hook size: 2.0 mm
  • 10 mm half beads for eyes
  • Hot glue gun
  • Black embroidering floss
  • Sewing needle and scissors
  • Fiberfill

Abbreviations:
R = row
mc = magic circle (magic ring)
ch = chain
sl st = slip stitch
sc = single crochet
hdc = half double crochet
dc = double crochet
inc = 2 sc in the next stitch
dec = single crochet 2 stitches together
FLO = front loop only
BLO = back loop only
F.o. = fasten off
(12) = number of stitches you should have at the end of the round/row
( )* 6 = repeat whatever is between the brackets the number of times stated

Amigurumi chick free crochet tutorial

(make 2)
With blue yarn:
Make 6 ch.
Make an oval, work on both sides of the chain.
R 1: From the 2nd ch from hook: 4 sc, 3 sc in last st, on the opposite side of the chain: 3 sc, inc (12)
R 2: inc, 3 sc, 3 inc, 3 sc, 2 inc (18)
R 3: 1 sc, inc, 3 sc, (1 sc, inc)*3, 3 sc, (1 sc, inc)*2 (24)
R 4: BLO 24 sc
R 5-6: 24 sc (2 rows)
R 7: 2 sc, dec, (1 sc, dec)*5, 5 sc (18)
R 8: 5 sc, 3 dec, 7 sc (15)
Change to yellow yarn:
R 9: BLO 4 sc, 3 dec, 5 sc (12)
R 10-15: 12 sc (6 rows)
F.o.
! For the second leg make 4 sc more. Don’t fasten off!

Go to R 8 and join blue yarn in 1st front loop you left in R 8.
R 1: FLO 15 sc
R 2: 15 sl st
F.o.

From second leg: 6 ch, join with the first leg in the 11th st of R 15.

R 16: 12 sc on the first leg, 6 sc in 6 ch, 12 on the second leg, 6 sc in 6 ch (opposite side) (36)
R 17: (5 sc, inc)*6 (42)
R 18: 14 sc, (1 sc, inc)*3, 15 sc, (1 sc, inc)*3, 1 sc (48)
R 19: (7 sc, inc)*6 (54)
R 20-21: 54 sc (2 rows)
Change to blue yarn:
R 22: 54 sc
R 23: BLO 54 sc
Change to green yarn:
R 24: BLO 54 sc
Change to white yarn:
R 25: (7 sc,dec)*6 (48)
Change to blue yarn:
R 26: 48 sc
Change to green yarn:
R 27: 3 sc, dec, (6 sc, dec)*5, 3 sc (42)
Change to white yarn:
R 28: 42 sc
Change to blue yarn:
R 29: (5 sc, dec)*6 (36)
Change to green yarn:
R 30: 36 sc
Change to white yarn:
R 31: 5 sc, dec, (10 sc, dec)*2, 5 sc (33)
Change to blue yarn:
R 32: 33 sc
Change to green yarn:
R 33: (9 sc, dec)*3 (30)
R Change to white yarn:
R 34: 30 sc
Change to blue yarn:
R 35: 4 sc, dec, (8 sc, dec)*2, 4 sc (27)
Change to green yarn:
R 36: 27 sc
Change to white yarn:
R 37: (7 sc, dec)*3 (24)
Change to yellow yarn:
R 38: BLO 24 sc
R 39: 24 sc
F.o. and leave a long tail for sewing.

With yellow yarn:
R 1: 6 sc in mc (6)
R 2: (inc)*6 (12)
R 3: (1 sc, inc)*6 (18)
R 4: 1 sc, inc, (2 sc, inc)*5, 1 sc (24)
R 5: (3 sc, inc)*6 (30)
R 6: 2 sc, inc, (4 sc, inc)*5, 2 sc (36)
R 7: (5 sc, inc)*6 (42)
R 8: 3 sc, inc, (6 sc, inc)*5, 3 sc (48)
R 9-12: 48 sc (4 rows)
R 13: (7 sc, inc)*6 (54)
R 14: 4 sc, inc, (8 sc, inc)*5, 4 sc (60)
R 15-19: 60 sc (5 rows)
R 20: 4 sc, dec, (8 sc, dec)*5, 4 sc (54)
R 21: (7 sc, dec)*6 (48)
R 22: 3 sc, dec, (6 sc, dec)*5, 3 sc (42)
R 23: (5 sc, dec)*6 (36)
R 24: 2 sc, dec, (4 sc, dec)*5, 2 sc (30)
R 25: (3 sc, dec)*6 (24)
R 26: 1 sc, dec, (2 sc, dec)*5, 1 sc (18)
R 27: (1 sc, dec)*6 (12)
R 28: (dec)*6 (6)
F.o.

Mark the eye points:
Points #1 and #2 are located between R 14 and R 15 at the distance of 10 stitches from each other.
Points #3 and #4 are located between R 15 and R 16 under point #1 and point #2.
Take a long needle with yellow thread, make a knot at the end of the thread.
Insert the needle from the neck hole and draw it out the point #1, than insert the needle in the point #3 and draw it out the point #2. Pull slightly. Insert the needle in the point #4 and draw it out the point #1. Pull slightly.
Repeat 2-3 times. F.o.

Glue the eyes, using a hot glue gun.

Embroider whites of the eyes with white yarn.
Embroider eyebrows and lashes with black floss.

With orange yarn:
R 1: 6 sc in mc (6)
R 2: 6 sc
R 3: (1 sc, inc)*3 (9)
F.o. and leave a long tail for sewing.
Sew the beak between R 15 and R 18 of the head.

Cheeks (make 2)
With pink yarn:
2 ch in mc, 10 hdc, sl st in the 2nd ch.
F.o. and leave a long tail for sewing.

Sew the cheeks between R 17 and R 21 of the head.

Embroider a smile with black floss.

Crest
Take a long needle with white thread, make a knot at the end of the thread. Start from the bottom of the head. Insert the needle and pull out in mc in the top of the head. Insert the needle in mc one more time and pull out in the bottom of the head, leaving a little loop on the top. Fasten the yarn on the bottom and repeat two times.
F.o.

With blue yarn:
3 ch in mc, 3 dc, 3 ch, sl st, 3 ch, sl st, pull off the magic circle.
Wrap the middle of the bow multiple times with blue yarn and sew to the head.


Skirt
Use two rows of front loops (R 22 and R 23) to crochet frill.
With green yarn:
Go to the R 22 and join the yarn to last st of R 22.
1: FLO 3 ch and 1 sc in one st, 2 dc in every st to the end of row, sl st in the 3rd ch.
2: 3 ch., 2 dc in next st, (1 dc in next st, 2 dc in next st)*53, sl st in the 3rd ch.
F.o.

With blue yarn:
Go to the R 23 and join the yarn to last st of R 23.
1: FLO 3 ch and 1 sc in one st, 2 dc in every st to the end of row, sl st in the 3rd ch.
F.o.

Collar
With green yarn:
Go to R 37 and join the yarn to last st of R 37.
R 1: FLO: 1 ch and 1 sc in one st, 23 sc, sl st in ch.
R 2: BLO: 1 ch, (1 sc, 1 dc, 1 sc) in next st, sl st in next st, (1 sc, 1 dc, 1 sc) in next st, sl st in next st, repeat to the end of row. Sl st.
F.o.

Sew the head to the body. Stuff firmly the neck area. A firmly stuffed neck will hold the head up.
Wings (make 2)
With yellow yarn:
R 1: 6 sc in mc (6)
R 2: (1 sc, inc)*3 (9)
R 3: 9 sc
R 4: 1 sc, inc, (2 sc, inc)*2, 1 sc (12)
R 5: 12 sc
R 6: (1 sc, inc)*6 (18)
R 7-14: 18 sc (8 rows)
R 15: (1 sc, dec)*6 (12)
R 16: (1 sc, dec)*4 (8)
Don’t stuff.
Fold top of wing flat and 4 sc through both sides across.
F.o. and leave a long tail for sewing.

Sew the wings on R 35 of the body.

Embroider shoelaces with white yarn, hide the yarn.

Little Rainbow Elephant Free Pattern

Little Rainbow Elephant Free Pattern


Little Rainbow Elephant

My height is about 8-9 cm. 
-Acrylic (100g-275 m) 
-Hook № 3. 
-Wire (thickness approx. 2.5 mm) 13cm, 
-4 pcs. Straight pins-needle with bead on the end, 
-A little white wool for felting (eyes), 
-2 Beads for eyes. 
-You can still cook the remaining yarn for strips, if you want to tie the elephant with strips. 
Symbol: 
X-Column without a scale 
V-Add 
A-Ubava 
(...) *?-allocated in Skockas to perform so many times 
[...] -Number of columns in a row 

Torso (Body head))) 

1series B "Amaguumi ring" 6x[6] 
2row 6V [12] 
3row (x V) * 6 [18] 
4th row (2x V) * 6 [24] 
5th row (3x V) * 6 [30] 
6th row (4x V) * 6 [36] 
7th row (5x V) * 6 [42] 
8-17 series 42X [42]-10 rows. In these rows I knit stripes (in this case 7 colors of the Rainbow) 
18th row (5x a) * 6 [36] 
19th Row (4x a) * 6 [30] 
20th row (3x a) * 6 [24] 
21th Row 24x] 
22row (2x a) * 6 [18] 
Fill the torso. 
23-24 series of 18x [18]-2 rows 
25th Row (4x a) * 3 [15] 
26-27 series of 15x [15]-2 rows 
28th Row (3x a) * 3 [12] 
29-31 series 12x [12]-3row 
Fill the base of the trunk 
32 Series (2x a) * 3 [9] 
33-36 Series 9x [9]-4 rows 
Insert Wire. and knit pulling periodically knitting, whatever it was going to tension. 
37 series (X a) * 3 [6] 
38-42 series of 6x [6]-5 rows 
43 series (X a) * 2 [4] This range should go already over the wire. 
44-47 Series 4x[4] 
Cut the thread, pull the hole and fasten the thread. 
Attach the shape of a trunk. 

Ears (2 Detki) 

Symbol: 
V-In the column of the previous row of 3 

1series B "Amaguumi ring" 3х [3] 
2row 3x[3] 
3row x V x [5] 
4th row 5x[5] 
5th row 2x V 2х [7] 
6th Row 7x] 
7th Row 3x V 3x [9] 
8th Row 9x] 
9th row 4x V 4x [11] 
10th Row 11x] 
Leave the tip of the thread 20cm 
Legs (4 details) 

1series B "Amaguumi ring" 6x [6] 
2-6 series 6x [6]-5 rows 
Leave the tip of the thread 20cm 

Legs fill, insert in them pins-needles. 
Put glue on the tip of the pin and stick to the place in the torso. 
The legs are nailed. The tip of the thread is deduced to the beginning of knitting trunk. 
Sewing the ears and also output the strings))) 

From the tips of the thread braid the desired length of the braid and get the tail! 

Attach the eyes to the eye 
Draw a blush. Embroider the mouth and the Boki. 

and!!! The Elephant is ready!!! 
Continue to decorate your own taste:)

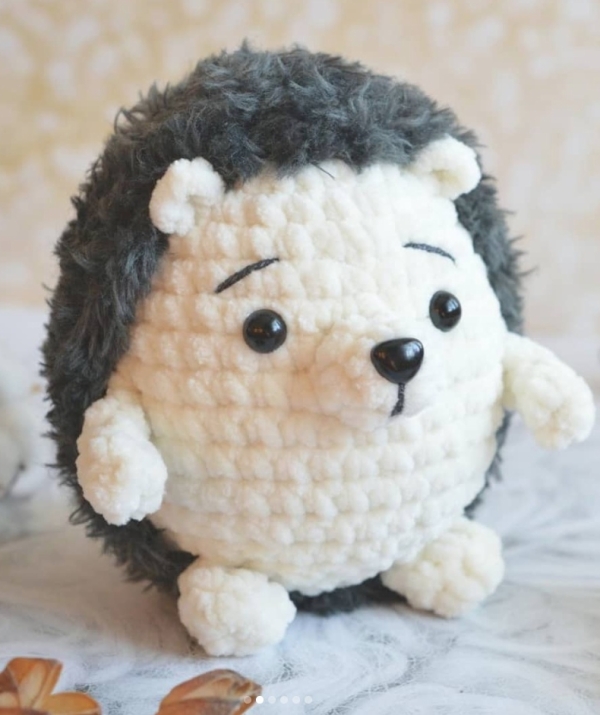
Amigurumi Hedgehog Free Pattern

Amigurumi Hedgehog Free Pattern


Knitted hedgehog :) Description 

Head-Torso 
1.6 SBN in CA (6) 
2. PR X6 (12) 
3. (1 SBN, D) X6 (18) 
4. (2 SBN, D) X6 (24) 
5.24 SBN (24) 
6. (3 SBN, D) X6 (30) 
7.30 SBN (30) 
8. (4 SBN, D) X6 (36) 
9.-13. 5 Rows without change 
14. (4 SBN, UB) X6 (30) 
15. (3 SBN, UB) X6 (24) 
16. (2 SBN, UB) X6 (18) 
17. (1 SBN, UB) X6 (12) 
18. UB X6 (6) 
Needles 
Knit turning rows. 
1.11 v. P. + 1 P. P. 
2.11 SBN (11) 
3. Ave, 9 SBN, OL (13) 
4.13 SBN (13) 
5. Ave, 11 SBN, OL (15) 
6.15 SBN (15) 
7. Ave, 13 SBN, OL (17) 
8.17 SBN (17) 
9. Ave, 15 SBN, OL (19) 
10.19 SBN (19) 
11. Ave., 17 Sbn, Ave (21) 
12.-18. 7 Rows without change 
19. UB, 17 SBN, UB (19) 
20. UB, 15 SBN, UB (17) 
21. UB, 13 SBN, UB (15) 
22. UB, 11 SBN, UB (13) 
23. UB X2, 5 SBN, UB X2 (9) 
Muzzle 
1.6 SBN in CA (6) 
2. (1 SBN, D) X3 (9) 
Ears 
Tie 4 VP, connect in Circle 
Pens 
1.4 SBN in CA (4) 
2.-3. 2 Rows without modification (4) 
Legs 
1.6 SBN in CA (6) 
2.6 SBN (6) 
3. Incomplete series. 3 SBN, SS (6)

Amigurumi Deer Free Pattern

Идеи подарков | Подарки своими руками ©


Knitted Deer Amgurumi + description

Tail 
2 identical parts of basic and white color. Let's start with the white.
We collect a chain of 8 air loops. On the first side of the chain in 2 of the hook loop: 1 PRSs, 1 PRSs, 1PSSN; 1 PRSPs; 1 SBN; 1 per hour On the second side of the chain: 1 SBN; 1 SBN; 1 PRSPs; 1 PRSPs; 1 PRSs; 1 PRSs.
On the white part of the thread fasten and trim, tie the second part (the base color)-and on it the thread is not cut, add both parts face outward, tie the edges together 12 SBN. Leave the tail for the stitching.

Legs 2 pcs 
We start with white color.
1.6 in the ring
2. * RBR, D * X3 (9)
3. * 2 SBN, D * X3 (12)
Change color to additional (color scarf)
4.12 GB
Change the color on the main
5. * 3 SBN, D * X3 (15)
6-7 15
8. * 4 SBN, D * X3 (18)
9.18 SBN
10. * 5 SBN, D * X3 (21)
11.21 SBN
On the first leg of a thread to fasten and trim, on the second continue to Knit 3 VP.

Connect both legs:
12.21 on the left leg, 3 on the VP, 21 on the right leg, 3 on the VP (48)
13-15 R. 48
16. * 14 SBN, UB * X3 (45)
17-18 45 pm
19. * 13 SBN, UB * X3 (42)
20-21 42 PM
22. * 12 SBN, UB * X3 (39)
23-24 39 pm
25. * 11 SBN, UB * X3 (36)
26-27 36 PM
28. * 10 SBN, UB * X3 (33)
29-30 33 PM
31. * 9 SBN, UB * X3 (30)
32-33 30
34. * 8 SBN, UB * X3 (27)
35.27
36. * 7 SBN, UB * X3 (24)
37. * 6 SBN, UB * X3 (21)
38. * 5 SBN, UB * X3 (18)
39. * 4 SBN, UB * X3 (15) + 5 more
Leave a long tail, trim the thread

Handles 2 pcs
We begin to knit white yarn.
1.6 in the ring
2. * RBR, D * X3 (9)
3. * 2 SBN, D * X3 (12)
4.6 SBN, 3 PRSs with one vertex, 5 SBN (12)
5. The 12th
Change to additional color (scarf color)
6. The 12th
Change to the main color.
7-22 12
The filler is put only in the brush handle. Fold the top edges and tie them down. Leave tail for stitching
The handles are nailed under 2-3 near the edge of the neck.

Horns 3 details, each for 2 pieces.
Part 1 (2 pieces)
1.6 in the ring
2-7 6
Leave the tail for sewing, cut off the thread.

Part 2 (2 pieces)
1.6 in the ring
2-4 6
Leave the tail for sewing, cut off the thread.

Part 3 (2 pieces)
1.6 in the ring
2-3 6
Leave the tail for sewing, cut off the thread.

To the base of the horn sew branches.

Head
White.
1.6 in the ring
2. D X6 (12)
3. * RBR, D * 6 (18)
4. SBN, D, * 2 SBN, PR * х5, SBN (24)
5. * 3 SBN, D * X6 (30)
6.2 SBN, D, * 4 SBN, D * x 5, 2 SBN (36)
7. * 5 SBN, D * X6 (42 in)
8-12 42 PM
13. UB, 5 SBN * 6 (36)
14.2 SBN, UB, * 4 SBN, UB * х5, 2 SBN (30)
15. * 3 SBN, UB * X6 (24)
16. SBN, UB, * 2 SBN, UB * х5, SBN (18)
17. * SBN, UB * X6 (12)
18. UB X6 (6)
Finish knitting

Head pad
The foreground color.
1.6 in the ring
2. D X6 (12)3. * RBR, D * 6 (18)
4. SBN, D, * 2 SBN, PR * х5, SBN (24)
5. * 3 SBN, D * X6 (30)
6.2 SBN, D, * 4 SBN, D * x 5, 2 SBN (36)
7. * 5 SBN, D * X6 (42 in)
8-11 42 PM
12. UB, 5 SBN * 6 (36)
13.36
Next, knit the swivel plates on the spout.
14.6 SBN, VP, rotate
15.6 SBN, VP, rotate
16.6, turn (without the VP)
17. Skip 1 P, 5 sbn, rotate (no vp)
18. Skip 1 P, 4 SBN, rotate (no vp)
19. Skip 1 P, 3 SBN, 1 VP, rotate
20.3 SBN, 1 VP, rotate
21.3 SBN, rotate (without VP)
22. Skip 1 P, 2 SBN, 1 VP, rotate
23.2 SBN, 1 VP, rotate
24.2 SBN, 1 VP
Next you need to tie the whole detail on the edge of the SBN: 9 on the overlay on the spout, 30 on the "cap" and 9 on the second half of the spout, 1 VP + SS. Leave a long tail, trim the thread

Muzzle (spout)
White
1.5 SBN in a ring
2. PR X5 (10)
3-4 10
5. * 4 SBN, D) X2 (12)
Leave the tail for sewing, cut off the thread.

Ears 
4 identical parts, 2 white and main color. Start with the white, the main will bind, as with the tail did 

1.6 in the ring
2. D X6 (12)
3. * 1 SBN, d * x2, 1 SBN, * 1 PRSPs, 1 PRSs, 1 PRSPs *, * 1 SBN, D * X3 (19)
Trim the thread on the white part. Use a needle or hook to pull the thread into the next loop and back into the last loop. Fold together 2 parts and tie the main color of the thread: 9 SBN, * 1 PRSPs, 1 PRSs, 1 VP, 1 PRSs, 1 PSSG * in one loop, 9 SBN. Fold the eyelet and tie the lower part of the 4th and 1SS. Leave the tail, trim the thread.

Assembly 
We collect the head. On a white ball it is necessary to put carefully a cap-overlay. Make sure that it turns out as smoothly as possible. Next, attach the spout, positioning it just below the middle of the muzzle. "Cap" is started to be pressed from the spout. Gently on the contour of the lining, further on the head and the second half of the spout. When the parts of the head are collected, the ears and horns are pressed. The white thread embroider specks on the forehead. The eyes and the spout embroider to your liking. The head is pressed to the torso. Attach the handles and tail.

Lic 
Dial 13 VP, start in the second loop from the hook: 12 on the back wall, 1 VP, turn knitting. Knit to the desired length. The edges of the Snoud sew on the toy already.

Plush Bear Amigurumi Pattern

Plush bear crochet toy designed by Ekaterina Nikolaeva. 
Yarn: Himalaya Dolphin Baby or YarnArt Dolce
Size:  25 cm

Abbreviations:
R = row
mc = magic circle
ch = chain
sc = single crochet
inc = 2 sc in the next stitch
dec = single crochet 2 stitches together
sl st – slip stitch
F.o. = finish off
(12) = number of stitches you should have at the end of the round/row
( ) * 6 = repeat whatever is between the brackets the number of times stated

Plush bear free amigurumi pattern


R 1: 6 sc in mc (6)
R 2: inc*6 (12)
R 3: (1 sc, inc)*6 (18)
R 4: (2 sc, inc)*6 (24)
R 5: (3 sc, inc)*6 (30)
R 6-8: 30 sc (3 rows)
R 9: (3 sc, dec)*6 (24)
R 10: (2 sc, dec)*6 (18)
R 11: (1 sc, dec)*6, sl st (12)
F.o.

(make 2)
R 1: 6 sc in mc (6)
R 2: inc*5, sl st (10)
F.o.

Hands (make 2)
R 1: 6 sc in mc (6)
R 2: (1 sc, inc)*3 (9)
R 3-7: 9 sc, sl st (5 rows)
Fold top of hand flat and 4 sc through both sides across. F.o.

(make 2)
R 1: 6 sc in mc (6)
R 2: inc*6 (12)
R 3-4: 12 sc, sl st (2 rows)
F.o. and cut the yarn on the first leg.
Don’t cut the yarn on the second leg!

From second leg: 2 ch, join the first leg.
Continue crocheting in the round:

Body
R 5: 12 sc, inc*2, 14 sc (30)
R 6-10: 30 sc (5 rows)
R 11: 11sc, dec*4, 11 sc (26)
R 12: 26 sc
R 13: 11sc, dec*2, 11 sc (24)
R 14: 24 sc
R 15: (2 sc, dec)*6 (18)
R 16: 3 sc, 4 sc together with sc of the 1st hand, 5 sc, 4 sc together with sc of the 2nd hand, 2 sc (18)
R 17:  (1 sc, dec)*6 (12)
F.o.

Muzzle
R 1: 8 sc in mc (8)
R 2: inc*8 (16)
R 3-4: 16 sc, sl st (2 rows)
F.o.
R 1: 6 sc in mc (6)
R 2: inc*6 (12)
R 3: dec*6, sl st (6)
F.o.


Crochet Criss Cross Spa Slippers Free Crochet Pattern – Video

If you love to crochet some house slippers for your family, you will love to check out Crochet Women Slippers Shoe Patterns Round-Up. Today we are going to share fabulous house slippers from the t-shirt yarns. Remember the Fabulous DIY Ways to Recycle Old T-Shirts yarns? You can make your own t-shirt yarn by cutting old tee into thin straps, or purchase t-shirt ribbon yarns of any color online. And you will love this most comfortable slippers you can make out of old t-shirts with double soles. You can also add some appliques and other accessories. Thanks to the author for the tutorial and for beautiful design. You can crochet these slippers for the whole family and it’s sturdy and easy to slip on.


Sweet Pig Amigurumi Pattern


Do you like this sweet crochet pig? Right here you can see how to make this amigurumi pig. To create a 6 inch (16 cm) pig doll you will need YarnArt Jeans yarn and 2.00 mm crochet hook.
Designed and photos by Victoria Mitrofanova

Materials:
1. Yarn: YarnArt Jeans colour 18 and 20
2. Hook size: 2.00 mm
3. 8 mm safety eyes
4. Fiberfill
5. Black embroidery floss (for nose, mouth and eyebrows), white embroidery floss (for eye whites)
6. Yarn needle
7. Scissors
8. Satin ribbon

Abbreviations:
R = row
mc = magic circle
ch = chain
sc = single crochet
inc = 2 sc in the next stitch
dec = single crochet 2 stitches together
sl st = slip stitch
F.o. = finish off
BLO = back loop only
FLO = front loop only
(12) = number of stitches you should have at the end of the round/row
( )*6 = repeat whatever is between the brackets the number of times stated


Legs and body

Legs (make 2)
With dark pink yarn:
R 1: 6 sc in mc (6)
R 2: (inc)*6 (12)
R 3: 12 sc
With pink yarn:
R 4: 12 sc
R 5: (3 sc, inc)*3 (15)

On the second leg don’t cut the yarn, you will use this yarn to crochet the body.

R 6: 15 sc on the 1st leg, 15 sc on the 2nd leg (30)
R 7: 30 sc
R 8: (4 sc, inc)*6 (36)
R 9: (5 sc, inc)*6 (42)
R 10-15: 42 sc (6 rows)
R 16: (12 sc, dec)*3 (39)
R 17: (11 sc, dec)*3 (36)
R 18: (4 sc, dec)*6 (30)
R 19: 30 sc
R 20: (3 sc, dec)*6 (24)
R 21: 24 sc
R 22: (2 sc, dec)*6 (18)
R 23: 18 sc
Stuff. F.o.

With pink yarn:
R 1: 6 sc in mc (6)
R 2: (inc)*6 (12)
R 3: (1 sc, inc)*6 (18)
R 4: 1 sc, inc, (2 sc, inc)*5, 1 sc (24)
R 5: (3 sc, inc)*6 (30)
R 6: 2 sc, inc, (4 sc, inc)*5, 2 sc (36)
R 7: (5 sc, inc)*6 (42)
R 8: 3 sc, inc, (6 sc, inc)*5, 3 sc (48)
R 9: (7 sc, inc)*6 (54)
R 10: 54 sc
R 11: 4 sc, inc, (8 sc, inc)*5, 4 sc (60)
R 12-19: 60 sc (8 rows)
R 20: 4 sc, dec, (8 sc, dec)*5, 4 sc (54)
R 21: 54 sc
R 22: (7 sc, dec)*6 (48)
R 23: 3 sc, dec, (6 sc, dec)*5, 3 sc (42)
R 24: (5 sc, dec)*6 (36)
R 25: 2 sc, dec, (4 sc, dec)*5, 2 sc (30)
Insert safety eyes between R 16 and R 17 at the distance of 9 sc from each other. Embroider eye whites with white floss.
Stuff.
R 26: (3 sc, dec)*6 (24)
R 27: 1 sc, dec, (2 sc, dec)*5, 1 sc (18)
Finish stuffing. F.o. and leave a long tail for sewing.

Muzzle
With dark pink yarn:
R 1: 6 sc in mc (6)
R 2: (inc)*6 (12)
R 3: 12 sl st in FLO of 2nd row
R 4: 12 sc in BLO of 2nd row
F.o. and leave a long tail for sewing.

(make 2)
With dark pink yarn:
R 1: 6 sc in mc (6)
R 2: (1 sc, inc)*3 (9)
With pink yarn:
R 3-7: 9 sc (5 rows)
F.o. and leave a long tail for sewing.

(make 2)
With dark pink yarn:
R 1: 2 ch, from the 2nd ch from hook: 2 sc, 1 turning chain.
R 2: 3 sc, 1 turning chain.
R 3: 4 sc, 1 turning chain.
R 4: 6 sc, 1 turning chain.
R 5: 8 sc, 1 turning chain.
R 6: 8 sc, 1 turning chain.
R 7: 8 sc.
F.o.

Make 24 sc around edges of ear with pink yarn.

With pink yarn:
Make 7 ch. From the 2nd ch from hook: (inc)*6 (12)

Embroider eyebrows, a nose and a mouth with black floss.

Leaf Stitch Crochet Pattern - Tutorial

Learning new crochet stitches is always a fun way to get inspired to create new crochet patterns. The crochet stitch I’m showing you today is one of the most particular ones.

The leaf stitch is just wonderful and very easy to learn. It is perfect for making elegant crochet skirts, cardigans, ponchos, and any other dresses.

As you may see from the photos below, this crochet stitch has a lot of relief, which makes this pattern even more unique.


Start making your crochet projects using the leaf stitch. Be creative, you can customize it and create a new crochet stitch all by yourself.

This pattern is really easy to understand. The video tutorial below will give you all the instructions on how to make the lovely leaf stitch.


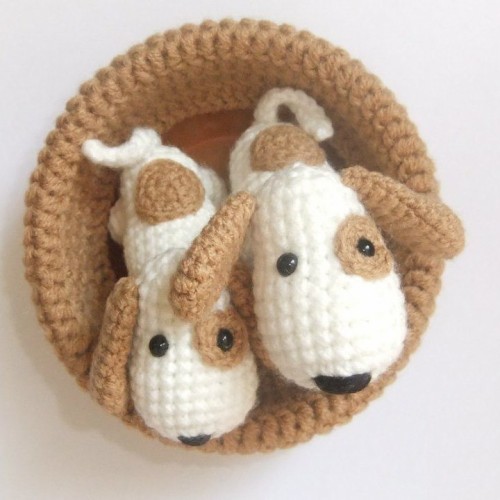
Crochet Toy Little Dog Free Amigurumi Pattern

Crochet Toy Little Dog Free Amigurumi Pattern

Designed by Evgeniia Kokina.


Abbreviations:
mc = magic circle
ch = chain
sc = single crochet
inc = 2 sc in the next stitch
dec = single crochet 2 stitches together
F.o. = finish off
( ) = number of stitches you should have at the end of the round/row
( )* 6 = repeat whatever is between the brackets the number of times stated

Little dog free amigurumi pattern

1: mc with 6 st (6)
2: inc x 6 (12)
3: (1 sc, inc) x 6 (18)
4: (2 sc, inc) x 6 (24)
5-8: 24 sc (24)
9: (6 sc, dec) x 3 (21)
10: 21 sc (21)
11: (5 sc, dec) x 3 (18)
12-14: 18 sc (18)
15: (1 sc, dec) x 6 (12)
Stuff the head.
16: dec x 6 (6)
F.o., leaving a tail for sewing.

1: mc with 6 st (6)
2: inc x 6 (12)
3: (1 sc, inc) x 6 (18)
4: (2 sc, inc) x 6 (24)
5-9: 24 sc (24)
10: (6 sc, dec) x 3 (21)
11: (5 sc, dec) x 3 (18)
12-15: 18 sc (18)
16: (1 sc, dec) x 6 (12)
Stuff the body.
17: dec x 6 (6)
F.o., cut the yarn.
Arms (make 2)
1: mc with 5 st (5)
2: inc x 5 (10)
3-5: 10 sc
6: only 5 sc
F.o., cut the yarn.

(make 2)
1: mc with 5 st (5)
2: inc x 5 (10)
3-4: 10 sc
5: only 5 sc
F.o., cut the yarn.

1: 12 ch
2: sc in 2nd ch from hook and in each ch across.

(make 2)
With brown yarn:
1: mc with 6 st (6)
2: inc x 6 (12)
3: (3 sc, inc) x 3 (15)
4-5: 15 sc
6: (3 sc, dec) x 3 (12)
7-8: 12 sc (12)
9: (2 sc, dec) x 3 (9)
10: 9 sc
11: 1 sc, 4 dec (5)

Spot near eye area
1: mc with 6 st (6)
2: (1 sc, inc) x 3 (9)

Spot at the back
1: mc with 6 st (6)
2: inc x 6 (12)
3: (1 sc, inc) x 6 (18)
MeasureMeasure

Crochet Bear Amigurumi


Crochet bear amigurumi. Crochet amigurumi bear pattern by Julia Deinega (Instagram: @deynega_yuly).
Designed and photos by Julia Deinega

Abbreviations:
R = row
mc = magic circle
ch = chain
sc = single crochet
inc = 2 sc in the next stitch
dec = single crochet 2 stitches together
F.o. = finish off
(12) = number of stitches you should have at the end of the round/row
( ) * 6 = repeat whatever is between the brackets the number of times stated

Crochet bear free amigurumi pattern

R 1: 6 sc in mc (6)
R 2: inc* 6 (12)
R 3: (sc, inc)* 6 (18)
R 4: (2 sc, inc)* 6 (24)
R 5: (3 sc, inc)* 6 (30)
R 6: (4 sc, inc)* 6 (36)
R 7: (5 sc, inc)* 6 (42)
R 8: (6 sc, inc)* 6 (48)
R 9: (7 sc, inc)* 6 (54)
R 10: (8 sc, inc)* 6 (60)
R 11: (9 sc, inc)* 6 (66)
R 12: (10 sc, inc)* 6 (72)
R 13: (23 sc, inc)* 3 (75)
R 14: (24 sc, inc)* 3 (78)
R 15-25: 78 sc (11 rows)
R 26: (24 sc, dec)* 3 (75)
R 27: (23 sc, dec)* 3 (72)
R 28: (10 sc, dec)* 6 (66)
R 29: (9 sc, dec)* 6 (60)
R 30: (8 sc, dec)* 6 (54)
R 31: (7 sc, dec)* 6 (48)
R 32: (6 sc, dec)* 6 (42)
R 33: (5 sc, dec)* 6 (36)
R 34: (4 sc, dec)* 6 (30)
F.o., leaving a tail for sewing.

R 1: 6 sc in mc (6)
R 2: inc* 6 (12)
R 3: (sc, inc)* 6 (18)
R 4: (2 sc, inc)* 6 (24)
R 5: (3 sc, inc)* 6 (30)
R 6: (4 sc, inc)* 6 (36)
R 7: (5 sc, inc)* 6 (42)
R 8: (6 sc, inc)* 6 (48)
R 9-17: 48 sc (9 rows)
R 18: (14 sc, dec)* 3 (45)
R 19: (13 sc, dec)* 3 (42)
R 20: (12 sc, dec)* 3 (39)
R 21: (11 sc, dec)* 3 (36)
R 22: (10 sc, dec)* 3 (33)
R 23: (9 sc, dec)* 3 (30)
F.o.


(make 2)
R 1: 6 sc in mc (6)
R 2: inc* 6 (12)
R 3: (sc, inc)* 6 (18)
R 4: (2 sc, inc)* 6 (24)
R 5-8: 24 sc (4 rows)
F.o., leaving a tail for sewing.
(make 2)
R 1: 6 sc in mc (6)
R 2: inc* 6 (12)
R 3: (sc, inc)* 6 (18)
R 4: (2 sc, inc)* 6 (24)
R 5: (3 sc, inc)* 6 (30)
R 6-11: 30 sc (6 rows)
R 12: (3 sc, dec)* 6 (24)
R 13: (2 sc, dec)* 6 (18)
R 14-16: 18 sc (3 rows)
R 17: 16 sc, dec (17)
R 18: 3 sc, dec, 12 sc (16)
R 19: 7 sc, dec, 7 sc (15)
R 20: 10 sc, dec, 3 sc (14)
R 21: 12 sc, dec (13)
R 22: 3 sc, dec, 8 sc (12)
R 23: 5 sc, dec, 5 sc (11)
R 24: 7 sc, dec, 2 sc (10)
F.o., leaving a tail for sewing.

R 1: 5 sc in mc (5)
R 2: inc* 5 (10)
R 3: (sc, inc)* 5 (15)
R 4-7: 15 sc (4 rows)
R 8: (sc, dec)* 5 (10)


(make 2)
R 1: 6 sc in mc (6)
R 2: inc* 6 (12)
R 3: (sc, inc)* 6 (18)
R 4: (2 sc, inc)* 6 (24)
R 5: (3 sc, inc)* 6 (30)
R 6: (4 sc, inc)* 6 (36)
R 7: (5 sc, inc)* 6 (42)
R 8-11: 42 sc (4 rows)
R 12: (5 sc, dec)* 6 (36)
R 13: sc, dec, 11 sc, (dec, sc)*2, dec, 11 sc, dec, sc (31)
R 14: 2 sc, dec, 6 sc, (dec, sc)* 3, dec, 6 sc, dec, 2 sc (25)
R 15-18: 25 sc (4 rows)
R 19: 5 sc, dec, 18 sc (24)
R 20: 11 sc, dec, 11 sc (23)
R 21: 16 sc, dec, 5 sc (22)
R 22: 20 sc, dec (21)
R 23: 4 sc, dec, 15 sc (20)
R 24: 9 sc, dec, 9 sc (19)
R 25: 13 sc, dec, 4 sc (18)
R 26: 16 sc, dec (17)
R 27: 3 sc, dec, 12 sc (16)
R 28: 7 sc, dec, 7 sc (15)
R 29: 10 sc, dec, 3 sc (14)
R 30: (5 sc, dec)* 2 (12)
F.o., leaving a tail for sewing.
Muzzle
R 1: 6 sc in mc (6)
R 2: inc* 6 (12)
R 3: (1 sc, inc)* 6 (18)
R 4: (2 sc, inc)* 6 (24)
R 5: (3 sc, inc)* 6 (30)
R 6: (4 sc, inc)* 6 (36)
R 7: (5 sc, inc)* 6 (42)
R 8: 42 sc


Sonia the sleeping doll amigurumi - Free pattern


Designed by Katusha Morozova (vk.com/handihat)
Photos by Katusha Morozova
Translated by Amiguroom Toys

Yarn:

for body light beige Vita Camilla (100% acrylic) 110g/300m
blue yarn NAKO Baby Marvel (25% wool, 75% acrylic) 50g/130m
white yarn NAKO Bambino 25% wool, 75% acrylic) 50g/130m

Hook: №2

Abbreviations:
R = row
mc = magic circle
ch = chain
sc = single crochet
st = stitch
sl st = slip stitch
inc = 2 sc in the next stitch
dec = single crochet 2 stitches together
DC = double crochet
hdc = half double crochet
BLO = back loop only
FLO = front loop only
( ) = number of stitches you should have at the end of the round/row
( )* 6 = repeat whatever is between the brackets the number of times stated

! Use the stitch marker

The sleeping doll free amigurumi pattern


(make 2)
With blue yarn:
R 1: 8 hdc in magic ring
R 2: (2 hdc in 1 sc)*8 (16)
R 3: (1 hdc, 2 hdc in 1 sc)*8 (24)
R 4: (3 hdc, 2 hdc in 1 sc)*6 (30)
R 5: 30 hdc
R : 30 hdc
R 7: 10 hdc, 5 hdc dec together, 10 hdc (25)
R 8: 9 hdc, 3 hdc dec together, 10 hdc (22)
R 9: 22 hdc
Change the colour. With white yarn:
R 10: BLO 22 sc
R 11: 22 sc
Change the colour. With blue yarn:
R 12-13: 22 sc
Change the colour. With white yarn:
R 14: 5 sc, 1 dec, 10 sc, 1 dec, 3 sc (20)
R 15: 20 sc
Change the colour. With blue yarn:
R 16-17: 20 sc
Change the colour. With white yarn:
R 18-19: 20 sc
Change the colour. With blue yarn:
R 20: 8 sl st, 1sc, 7 hdc, 1 sc, 3 sl st (20)
R 21: 9 sc, 7 hdc, 4 sc (20)
Change the colour. With white yarn:
R 22: 20 sc
R 23: 7 sc, 1 inc, 10 sc, 1 inc, 1 sc (22)
Change the colour. With blue yarn:
R 24-25: 22 sc
Change the colour. With white yarn:
R 26: 8 sc, 1 inc, 10 sc, 1 inc, 28 sc (24)
R 27: 24 sc
Change the colour. With blue yarn:
R 28-29: 24 sc
Change the colour. With white yarn:
R 30: 9 sc, 1inc, 10 sc, 1 inc, 3 sc (26)
R 31: 26 sc
Change the colour. With blue yarn:
R 32-33: 26 sc
Change the colour. With white yarn:
R 34: 9 sc,1 dec,10 sc, 1 dec, 3 sc (24)
R 35: 24 sc
Stuff the leg. Up of leg don’t stuff firmly.
R 36: Fold top of leg flat and sc through both sides across. Make 12 sc (12)

Go to row 10.
R 1: FLO: (10 sc, 1 inc)*2 (24)
R 2: (1sc, 3 ch ) in 1 sc and continue the end of row.

Look at the picture:


Start making the body:

Make sure that the legs are positioned correctly (toes are straight to you).
Join blue yarn to the right leg:
12 sc FLO on the first leg, make 3ch, join the second leg: 12 sc FLO on the second leg, turn the work: 12 sc FLO on first leg, sc in next 3 ch, 12 sc FLO on other leg.
R 1: 54 sc (54)
R 2: (8 sc, 1 inc)*3, (2 sc, 1 inc)*9 (66)
R 3-4: 66 sc
R 5: BLO 66 sc
R 6-9: 66 sc
R 10: (9 sc, 1 dec)*6 (60)
R 11-13: 60 sc
R 14: (10 sc, 1 dec)*5 (55)
R 15-17: 55 sc
R 18. (9 sc, 1 dec)*5 (50)
R 19-21. 50 sc
R 22. (8sc, 1 dec)*5 (45)
R 23-24: 45 sc
R 25: (7 sc, 1 dec)*5 (40)
R 26: 40sc
R 27: (8 sc, 1 dec)*4 (36)
R 28-30: 36 sc
R 31: (4 sc, 1 dec)*6 (30)
R 32: (3 sc, 1 dec)*6 (24)
Change the colour. With light beige colour yarn:
R 33: (2 sc, 1 dec)*6 (18)
R 34-37: 18 sc
Don’t cute the yarn.
Start making the head.

Head
R 1: (2 sc, 1 inc)*6 (24)
R 2: (3 sc, 1 inc)*6 (30)
R 3: (4 sc, 1 inc)*6 (36)
R 4: (5 sc, 1 inc)*6 (42)
R 5: (6 sc, 1 inc)*6 (48)
R 6: (7 sc, 1 inc)*6 (54)
R 7: (8 sc, 1 inc)*6 (60)
R 8: (9 sc, 1 inc)*6 (66)
R 9. (10 sc, 1 inc)*6 (72)
R 10-14: 72 sc
R 15: (1 dec,3 sc)*3, 1 dec, 2 sc, (1 dec,3 sc)*3, 1 dec, 36 sc (64)
Attention! The marker must be on the side: we start to crochet cheeks, they must be in the front!
R 16-18: 64 sc
R 19: (10 sc, 1 inc)*2, 42 sc (66)
R 20-21: 66 sc
R 22: (1 dec, 9 sc)*6 (60)
R 23: (1 dec, 8 sc)*6 (54)
R 24: (1 dec, 7 sc)*6 (48)
R 25: (1 dec, 6 sc)*6 (42)
R 26: (1 dec, 5 sc)*6 (36)
R 27: (1 dec, 4 sc)*6 (30)
R 28: (1 dec, 3 sc)*6 (24)
R 29: (1 dec, 2 sc)*6 (18)
R 30: (1 dec, 1 sc)*6 (12)
R 31:. 6 dec (6)
Stuff the head.


(make 2)
With light beige colour yarn
R 1: 6 sc in mc
R 2: 6 inc (12)
R 3: (1 inc, 1sc)*6 (18)
R 4-8: 18 sc
Change the colour. With blue yarn:
R 9: BLO 18 sc
R 10-11: 18 sc
R 12: (4 sc, 1 dec)*3 (15)
R 13-26: 15 sc
R 27: (3 sc, 1 dec)*3 (12)
R 28-35: 12 sc
R 36:. 6 dec (6)
R 37: 3 dec (3)
Stuff. Up of arm don’t stuff firmly.
With blue yarn:
Start 60 ch and make a circle.
Make sure that this size pass to the head, if not make longer or shorter.
R 1-2: 2 ch, 59 DC, 1 sl st
Change the colour. With white yarn:
R 3: 2 ch , 59 DC, 1 sl st
Change the colour. With blue yarn:
R 4: (8 DC, 1 DC dec)*6, 1 sl st (54)
Change the colour. With white yarn:
R 5: 2 ch, 53 DC (54)
Change the colour. With blue yarn:
R 6: (7 DC, 1 DC dec)*6, 1 sl st (48)
Change the colour. With white yarn:
R 7: (6 DC, 1 DC dec)*6, 1 sl st (42)
Change the colour. With blue yarn:
R 8: (5 DC, 1 DC dec)*6, 1 sl st (36)
Change the colour. With white yarn:
R 9: (4 DC, 1 DC dec)*6, 1 sl st (30)
Change the colour. With blue yarn:
R 10: (3 DC, 1 DC dec)*6, 1 sl st (24)
Change the colour. With white yarn:
R 11: (2 DC, 1 DC dec)*6, 1 sl st(18)
Change the colour. With blue yarn:
R 12: (1 DC, 1 DC dec)*6, 1 sl st (12)
R 13-22: 12 DC
R 23: 6 dec (6)

Scarf
With white yarn:
Make chains for 30 cm long
R 1-4: hdc in every st and continue to the end of row.

Dress bottom
Keep the doll head down position.
Go to the R 5
With blue yarn:
R 1: FLO 66 sc
R 2: (2 DC, 1 DC inc)*22 (88)
With white yarn:
R 3: (1 sc, 3 ch) in one st and continue to the end of row.

View more photos GO to  >>> The sleeping doll tutorial  <<<


----------------------------------